Installing Iodine for DNS Tunneling
2017-12-26
A few days ago, I was talking with a friend who lives in a heavily Internet censored country, about options to circunvent the government controls.
He used to rely on TOR, but lately the ISP on his country started to be able to block it also. Looking for alternatives we decided to try a different way of covert channel. We decided to use DNS.
If you own a domain, and you have a server capable of using port 53 UDP. Then you can quickly setup Iodine to create a tunnel that uses DNS queries to transport data. Although it wont protect your anonimity as TOR will. It is a good tool that you can use as last resource if everything else fails. Please have in mind that that traffic through the tunnel IS NOT ENCRYPTED, you should use VPN through it. So lets get a quick view on how to get it up&running very fast.
Requirements:
- Ubuntu/Debian Server(Can be other distro, this guide is based on Ubuntu 16.04 LTS)
- No DNS running on the server (We will need to use port 53 UDP)
- Ability to modify A and NS records on a domain.
- Iodined (Server side of the Iodine solution)
- Iodine (Linux Client)
Modifying the Domain
We need to add an A and a NS record to our domain. For the NS record, as an example I’m using Cloudflare DNS settings:

The second A record is really straight forward.

So in summary as an example:
t1		IN	NS	t1ns.mydomain.com.		; note the dot!
t1ns		IN	A	10.15.213.99
Installing the Iodine Server
As we mentioned, the we are installing the sofware in Ubuntu Server, so the installation can be done very quickly with Apt, Arch users can get it from pacman without any problem either. The current version on Xenial’s repositories is: 0.7.0-4 so is current.
sudo apt install iodine
If everything went ok, we should be able to run our server.
sudo ./iodined -c -f 10.0.0.1 -P secretpassword t1ns.mydomain.com &
Where:
- “-c” is to disable check of client IP/port on each request.
- “-f” to keep running in foreground.
- 10.0.0.1 is an ip on a different subnet than the one that your server has.
- “secretpassword” Is a password that Iodine will use to authenticate connections.
- t1ns.mydomain.com is the domain that we setup at the beggining.

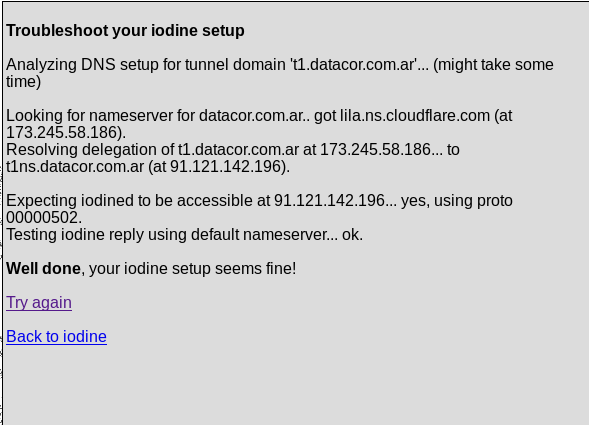
Now that the server is up & running, we can test it on Iodine’s test page:
Installing the Iodine Client
If the results of the test were succesful. Then its time to configure the client that will be using the tunnel. In my case Im using Debian 9, but there are binaries for Windows also. Install Iodine with Apt:
sudo apt install iodine
Then run it with the server details.
./iodine -f -P secretpassword t1.mydomain.com
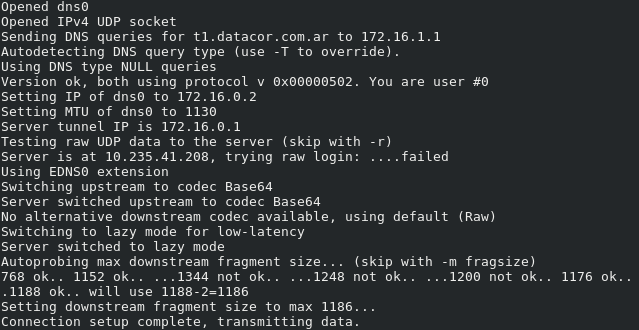
if the connection went ok, you will see a new network interface called “dns0”. You can verify it:
ip address show dev dns0
At this poing you should be able to ping the IP on the new subnet that you choose on the server.
Redirection of traffic.
At this point there is a DNS tunnel established between your client and the server. What we are missing right now is to route all the traffic through that tunnel. For that, first established a quick NAT on the server.
echo 1 > /prov/sys/net/ipv4/ip_forward
iptables -t nat -A POSTROUTING -o eth0 -j MASQUERADE
iptables -A FORWARD -i eth0 -o dns0 -m state --state RELATED,ESTABLISHED -j ACCEPT
iptables -A FORWARD -i dns0 -o eth0 -j ACCEPT
eth0 is the external network interface on your server.
On the client:
First we add an static route to the DNS server
route add yourdnsserverIP gw yourhomegatewayIP
Then we remove the current default gateway and we replace it with the IP used on the server setup.
ip route del default via 10.0.0.1
ip route add default via 172.16.0.1
Thats all.! Enjoy your tunnel!.